

I’m pretty hard on my gear. I’m out in all weathers, and most days of the week. My waterproofs have the roughest time of it, having to deal not only with sideways Scottish rain but also sweat, mud, rucksack abrasion.

I’ve been tinkering with the idea of bike packing for a while. It looks brilliant for a start, all that fancy luggage and those beefy trail hungry bikes. Bike touring for extra rugged types, count me in! The luggage ain’t cheap, so after deciding that this might be my new passion, I started collecting bits, and then did a mini mountain bike tour back in the summer on easy trails around Ben Alder. All this was building up to the big one, two weeks in the mountains of Crete in October. So now I’m back, and I have the benefit of hindsight. Here’s what I have learned.

Adventure Bike, my go anywhere, do anything bike.
It’s a no brainer really, if you’ve got a big trip planned, start with thinking about how your bike needs to be set up. For Crete, we knew we would be riding a mixture of tarmac and unsealed agricultural roads with lots of height gain every day. Tracks can be rough and thorny. I’m lucky to have a choice of bikes (n+1 anyone?) and decided that my Adventure Bike would be the most comfortable ride for this trip. It’s fairly light, with a tough aluminium frame, strong wheels, and we fitted brand new Schwalbe Landcruiser tyres to keep those thorns out (which they did, with zero punctures in 2 weeks of riding). Adventure Bike has a triple chainset but with my lack of training, I knew the hills would be my nemesis. I decided that I wanted to bring as little luggage as possible, staying in rooms and hotels along the way. This was a good call as the hills were massive, so I got this bit right at least! However, some aspects of my bike weren’t ideally suited to the luggage I wanted to carry. More on this later. Meanwhile, Wally was riding an adapted Scott mountain bike and had even friendlier gears on the hills, but he compromised with less performance on the rare tarmac flats.

Fully loaded and adventure ready.
The point of bikepacking luggage is twofold. Firstly, by distributing the weight around the bike in small packages and using frame bags, it’s possible to keep the centre of gravity low and close to where the rider sits. This is great for rough trails and technical terrain. Secondly, in theory, it is also a lot more aerodynamic than bulky panniers clipped on to a bike rack. I bought a secondhand half-frame bag from a pal, to optimise that centre of gravity benefit, but I quickly realised that it made using my bottle cages awkward. I knew water could be an issue in the dusty heat of Crete so carrying plenty of water would be essential, but no bother, I excitedly purchased an adapter kit that allowed me to fit my bottles to my forks. My bike now looked awesome, and like a proper Adventure Bike! My delight lasted until my first headwind, when I discovered that fork mounted bottle cages are a bit like sails. Great with a tailwind but rubbish in a headwind. My sporty bike with drops and a relatively tucked riding position was transformed in to a plodder.

The perfect bread carrying solution?
As we got the hang of things, Wally’s handlebars became the perfect place to store fresh bread and delicious Cretan pies, snuggled safely between a map case and his bar bag. To be honest though, from the word go, our gear was definitely a bit DIY… Proper bikepacking luggage is gorgeous and exciting but also very expensive. My set up ended up being a bit of a mishmash of off the peg luggage (love the Koala 13 from Alpkit), and bits cobbled together from drybags and assorted straps that we collected in the run up. I strapped a drybag to my handlebars using segments of alkathene water pipe (thanks to a plumber friend), to hold it off my bars and leave space for my hands, (I bought an Alpkit Joey handlebar harness to help with this). I carried a small roll of gaffer tape, which I regularly applied to protect the bag from an exposed section of brake cable. At the last minute before we left, I found an old lens pouch for a camera which strapped on to my bar bag and could be filled with snacks, and a luggage strap that held my flipflops on to the saddle bag, so that I was always beach ready!

Front end, with asymmetric bar bag…
I left my dummy run until too late, and discovered that my number one problem was going to be the interaction of my bar bag and my road style gear levers on my drop handlebars. Adventure Bike has narrow profile Bontrager bars, designed for women and other people with small hands, which I absolutely love, and have improved my confidence when descending. The massive down side which I had not appreciated until I was in the thick of it, is that if you strap a bulging bar bag to them, you can’t easily use the gear shifters. This was a particular issue from my front (left) shifter which needs more room to travel than the right. Getting the set up right so I could push the levers required lots of trial and error every morning, pulling on the straps to deform my bar bag to exactly the perfect dimensions for my gears to work. This was intensely annoying, for my companion as well as me (I swore and grumped about even more than usual in the mornings) and I’m keen to hear from anyone who has solved this problem.

The daily kit faff before we can set off.
Which brings me to the thing I really hadn’t appreciated. Panniers fitted to bike racks are easy. They are big buckets of happiness ready to accept whatever kit you throw in them. It doesn’t really matter what order your gear goes in to a pannier because you can always have a rummage about later. In contrast, bike packing luggage is a total faff. The bags are smaller, and odd shaped things like tools or guidebooks will only fit in certain places. Some of your gear is going to be totally inaccessible all day without dismantling the entire set up, so packing requires planning. And then each bag needs fitted and tensioned perfectly to withstand the bumpy ride it is going to get on those fun trails. I’ve realised that although bikepacking gear definitely looks the epitome of rugged adventurousness, if I know I’m only going to be on tarmac, I’d much prefer to tour with panniers and a bike rack. That said, a bikepacking set up really is superior on rough and technical terrain.
I’ve been doing lightweight trips on foot for decades and I am still constantly honing and improving my gear. I’ve come to realise that in this respect bikepacking set ups are the same. What works for one person, on a particular journey, will not work for another, and tinkering on the road is also absolutely going to happen. I’m looking forward to hanging my nose over other people’s set ups, and if anyone reading this has some top tips they’d like to share, I’m all ears.

As we develop this blog we plan to bring much more than the occasional trip report to the site. We already have a section of Top Tips for enjoying the outdoors, and this is the first of our Reviews, which we hope will include our favourite tried and tested pieces of gear, as well as new products that we think are of interest. The Guppy Friend laundry bag, which costs £25 and is available from Surfers Against Sewage, is something we've been trying for about a month, and in that time we've been getting the hang of using it, and finding out how it works.

The ocean, is ultimately where microfibres end up. After that... who knows?
What (and why?) is the Guppy Friend?
The Guppy friend is, in short, a bag designed to catch microfibres, that you put your synthetic (polyester, fleece etc) laundry in, before shoving it in the washing machine. If you've already heard of the scourge of microfibres then you may already understand why this is important, but concerns about the problem that microfibres present for our environment are only just becoming widely known. The problem is, that tiny pieces of fibre break off our clothes every time we launder them, and are washed in to our water systems. The concern about synthetic microfibres, is that like plastic, they persist in the environment for an unknown period of time. A 2017 IUCN report in to Primary Microplastics in the Oceans, estimates that 1.5 million tons of microplastics enter the oceans every year. Of these, 34.8% come from textiles. They slosh around the oceans and rivers, picking up toxins and entering the food chain. Some are so tiny they can even cross cell membranes. We have no idea at this stage what this means for human health but the potential problems are scary to say the least. For those of us that live in synthetic outdoor clothing, the realisation that we may be part of the problem is worrying. The Guppy Friend was invented by some German surfers to try and help solve the problem. It's probably only part of the picture- but the bag is intended to catch the microfibres in the wash, and stop them from going down the drain.
My extreme Guppy Friend test.

Before getting a Guppy Friend, I spoke to a few people who had already used them, and asked how they found them. "Easy" was the common response, but also "I think it works, although I can't see any microfibres in the bag". How to tell if it works? I decided to give it an extreme test, using an extremely old, and frankly environmentally diabolical, fleece blanket, that is so degraded, it leaves a fine mist of microfibres where ever it goes. The first problem I ran in to, is that the Guppy Friend is only supposed to be half filled when it is used. My blanket is pretty big (its a blanket) but I decided to make an exception this time, and hoped that I wouldn't destroy my washing machine.

Microfibres from one wash of the blanket of doom.
After a cool wash (as recommended by Guppy Friend), I pulled the blanket out of the bag. It was dripping wet, the spin cycle seemed to have been completely ineffective. I've since learned that this is a consequence of overfilling the bag. A quick check around the seams revealed a horrifying amount of green fluff, all caught in the bag. Guppy Friend are keen to stress that you should never wash these away as it negates the whole point of the bag. Put them in the bin without delay!
What next for the blanket of doom?
These recommendation above about how to dispose of fibres might help answer a burning question that I have about what to do with the offending blanket. Should I continue to use it (microfibres)? Should I bin it (and add to the landfill burden) or return it to it's hiding place at the back of our airing cupboard? I decided to ask Twitter, who preferred the out of sight, out of mind option. For the moment, I'm hanging on to it, in case some form of redemption can be found. Creative ideas welcome...
Dear eco-conscious twitter, a question of morality and the environment. I have an old polypropylene fleece blanket that sheds microfibres like hell. I care about the environment. What should I do with it? Pls RT etc... #microfibres #plasticplanet
— Lucy Wallace (@snoweider) March 19, 2018
Guppy Friend extended test.
Meanwhile, the Guppy Friend has seen a lot more normal use, and we've been getting the hang of it's little idiosyncracsies. After each wash, I run a tissue around the seams and wipe out the tiny microfibres. The main problem I have is due to the type of laundry that we generate- which is very heavy on the synthetic fibres, with lots of fleece, and technical outdoor gear. The guppy friend will only take about one set of thermals (tops and bottoms) and a light fleece. Any more than that and it affects the spin cycle. I've taken to putting what I think are likely to be the worst offenders in the bag, and running the rest through as normal. I've not tried using a second bag as yet- at £25 each it's quite an investment.
So what else can we as outdoor consumers do to prevent microfibre pollution from our laundry? Evidence is emerging that if we wash our gear a bit less, reduce the temperature, and slow the spin cycle, we can help reduce microfibre release. Buying good quality gear is also key- cheap fleeces that pill and bobble in the wash are releasing microfibres much more quickly. If buying new, then its worth considering biodegradeable alternatives where appropriate, such as merino wool, or biosynthetics like Tencel Lyocell.
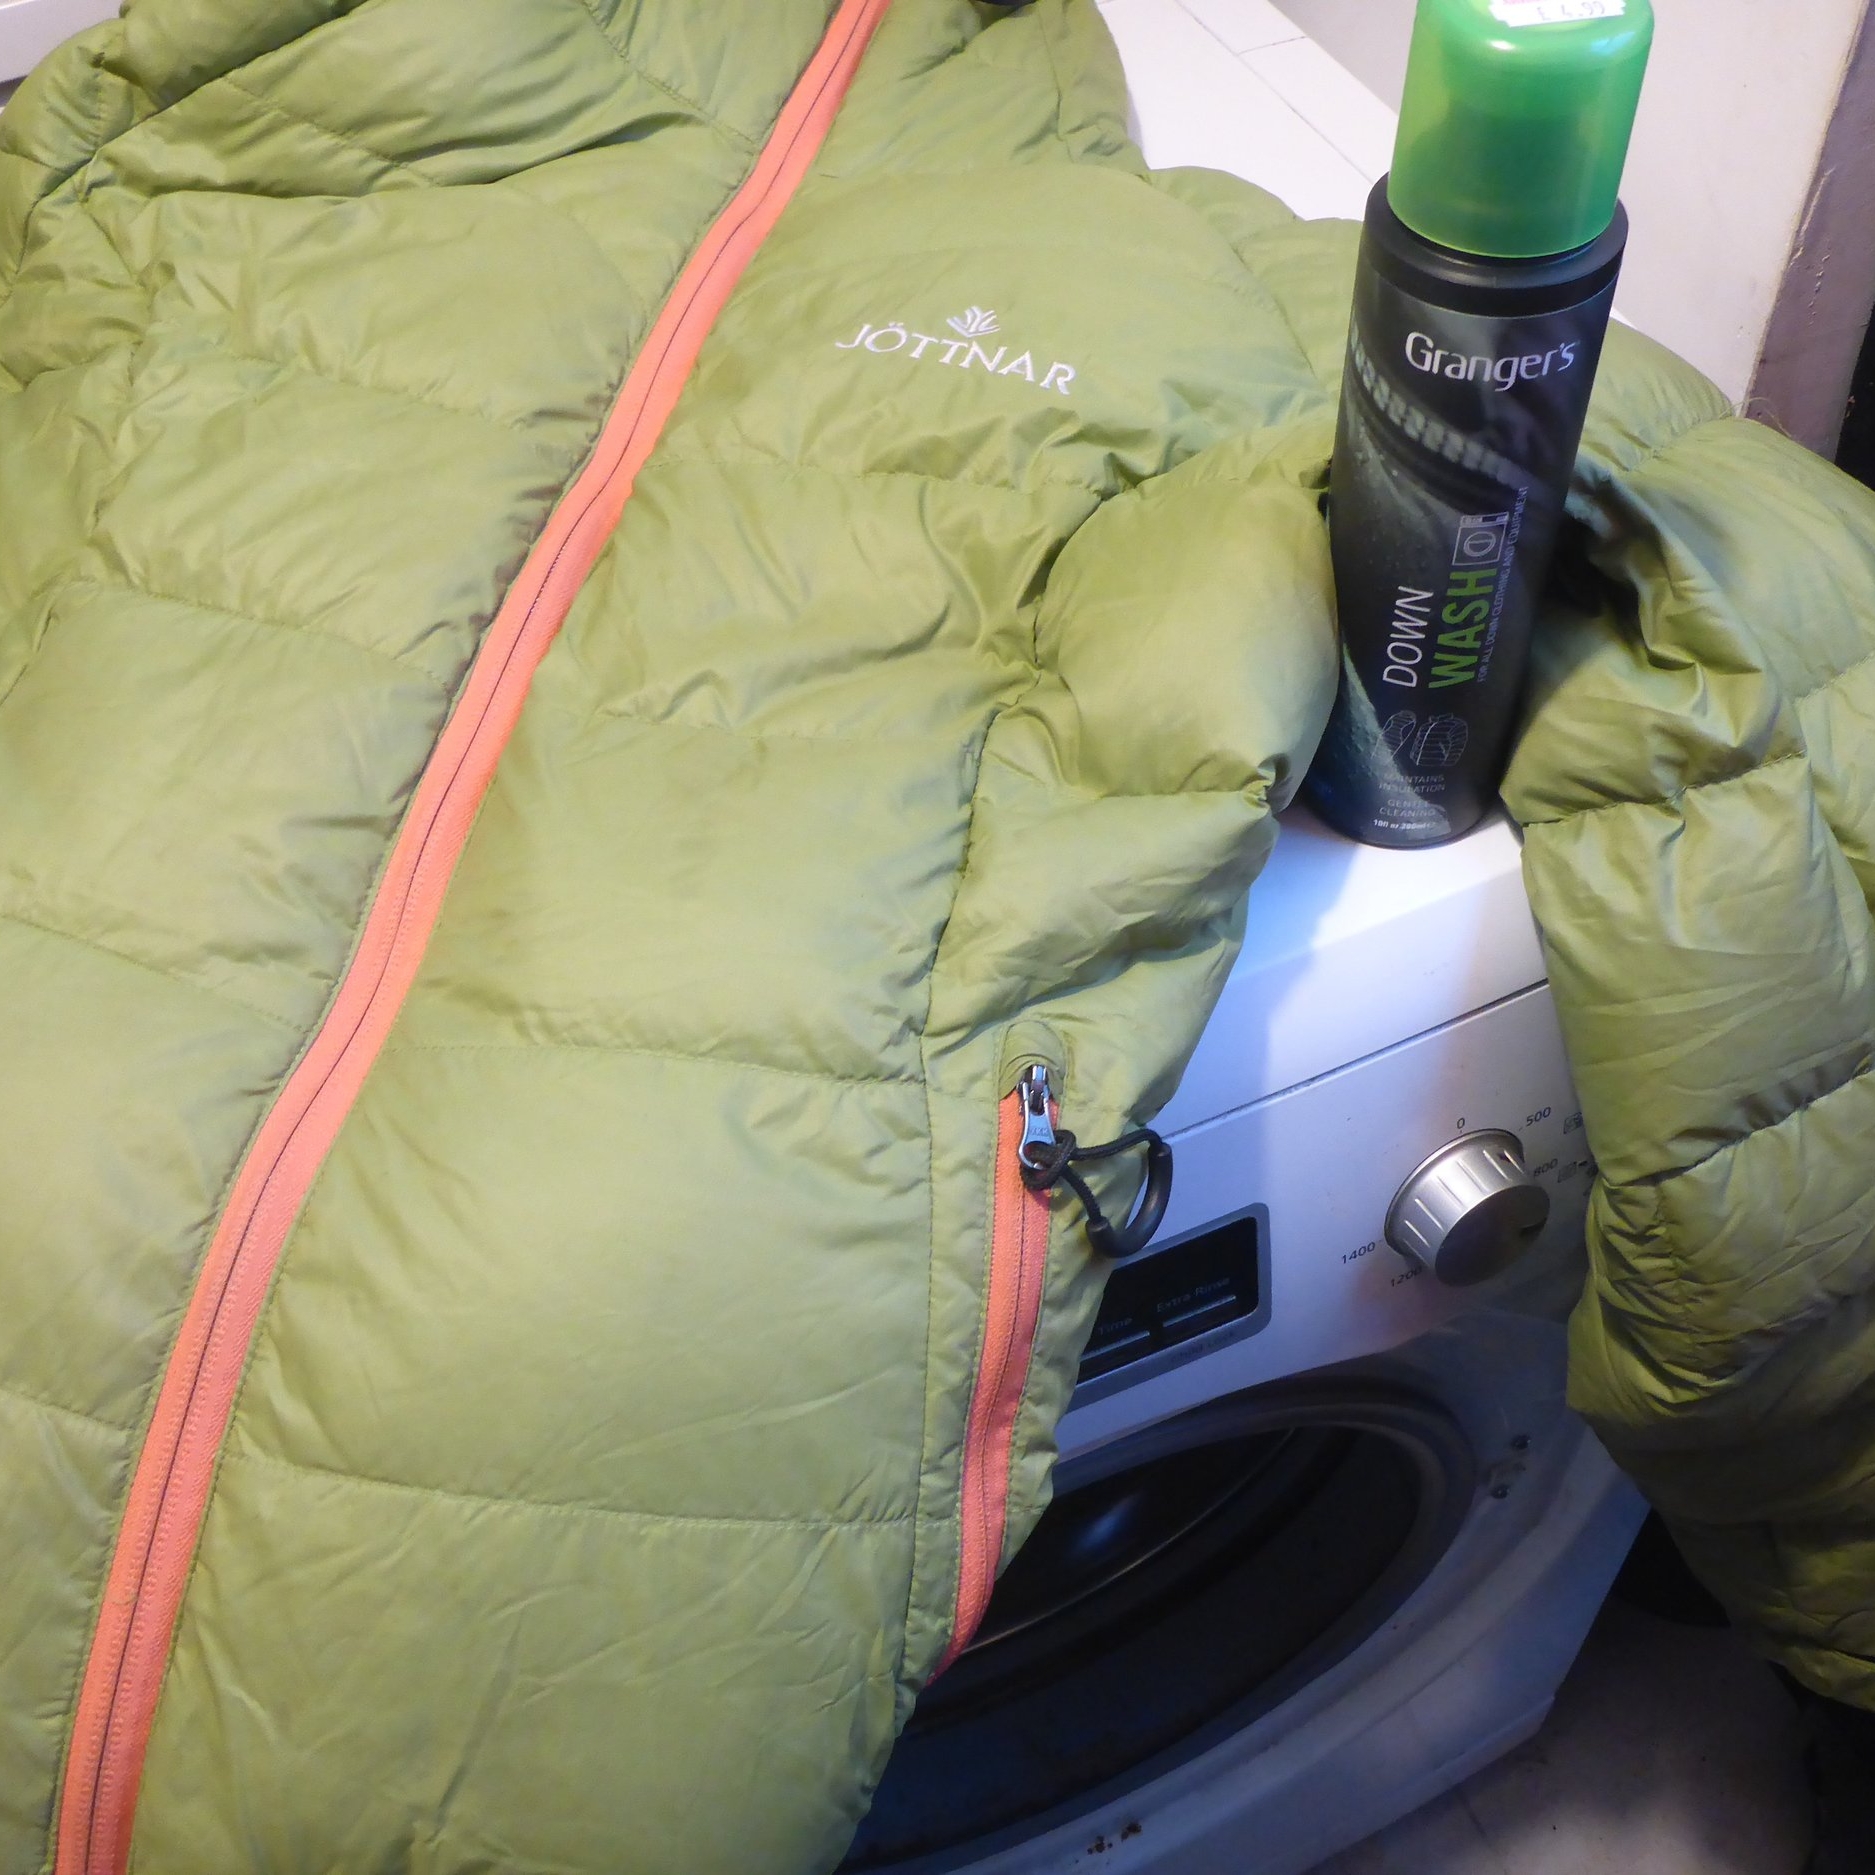
In the run up to our Alpine adventure, Wally and I spent a lot of time sorting and preparing our kit for the cold weather we hope to enjoy. This included washing and repairing our down jackets. Care for down equipment in cold weather is very important- as important as looking after your boots or any other bit of essential gear. Down jackets are filled with light and compressible feathers that keep you cosy by trapping warm air. They don't like getting wet, as this makes them heavy and they loose their fluffiness, or "loft". However, dirt, grime, sweat and body oils can have the same affect over time, so every now and then they need a good careful clean. In this blog post, we will take you through the step by step process that we use, and share some pointers that we have learned along the way.
First of all, read the cleaning instructions on your garment care label. We strongly recommend that you DONT wash sleeping bags. These items are too big and bulky for domestic washing machines and tumble dryers. If possible, use a professional down cleaner with experience of cleaning technical sleeping bags. Smaller items such as down jackets can be cleaned at home. What you need are the following things:

Make sure that you have a day or a long evening in front of the telly planned! You'll want to be on hand to ease the process along. Before washing the jacket, check that there aren't any holes where feathers can leak out. If there are, you may wish to consider repairing these with a dab of seam grip and leaving this to set overnight. Larger holes could mean that you need to put your cleaning plans on hold as these will require careful patching before laundering.
Ensure that all zips and hook and loop closures are fastened. Put the jacket in the washing machine on it's own, and wash at 30 degrees with your down cleaning agent. I prefer to turn the spin cycle down as wet feathers are heavy and spinning could damage lightweight stitching and baffles. When the washing machine has finished, your down jacket will look like a cat that has just got out of the bath. At this moment, things are a bit scary. Did I mention that down jackets really don't like being wet?
Now the hard work begins.

Put the jacket in the tumble dryer on low with a couple of tennis balls. You should not go far from it for the next few hours, checking on it every 20 minutes or so and giving it a gentle shake. As it dries, you will notice that there are clumps of soggy feathers and empty areas where there are none. This is where your care and attention is essential. Take the time to shuggle and coax the down in to areas where it is needed, and with your fingers fluff the clumps gently. It's worth doing this each time you check on the jacket. The amount of time your jacket takes to dry will depend on the amount of down inside and the air permeability of the shell. Wally's vintage first generation Gore-Tex Mountain Equipment Annapurna jacket takes a lot longer than my light weight Jottnar Fjorm.
Eventually, it will start to feel normal. Don't stop! It's still not dry yet. I like to give a few more goes in the tumble drier until it feels fluffier and better lofted than it did before. The final round in the drier makes all the difference.

Finally, to maximise the lifespan of your down jacket, be sure to store it in a dry place, where it has plenty of room to expand and loft. It's definitely not a good idea to store it for any length of time in a stuff sack, even if it is supplied with one. Hopefully with these top tips, your beloved jacket will keep you warm for years to come!
Lucy: Wally and I do a lot of multi day camping trips, for fun, as well as for work as freelance mountain leaders. That amount of time spent on the trail means that I try hard to keep the gear that I'm carrying as light as possible, including my food. Specialist backpacking food can be tasty and nutritious, but it is expensive. The readymade alternative is unhealthy supermarket couscous and noodle mixes. A few years ago I started making my own meals to take on the trail and gradually I've refined my camp nourishment, to the point that I reckon I've pretty much got breakfast and dinner nailed (for me anyway). The key ingredient is Lakeside's Soup n Sauce bags, which can take boiling water and are reuseable up to a point. Here's how:

The basic ingredients are museli and powdered milk but to this I can add whatever takes my fancy, to build up a wholesome and filling breakfast. I add boiling water to it when I make my morning brew each day to create an instant porridge. This week I'm mostly eating:
I find this mix keeps me full for a while, and is also inviting (the chocolate raisins ensure that). Chia seeds and nuts help keep my protein and omega3 levels topped up.

After years of trucking through supermarket flavoured couscous I discovered a home blend is so much better. I can make sure that I get enough calories, and add delicious extras to make the meal more enjoyable and healthy. You do pretty much have to like couscous a lot for this to work! The advantage is that you just add boiling water which uses a lot less gas that pasta for example. Like the museli porridge, you can add whatever you fancy. I don't do beef or pork, but I reckon a bit of dried sausage or beef jerky would be nice for someone who does. Here's my current fave mix:
I'm still figuring out the ultimate multi day lunch hack. If anyone has any top tips to share, I'll give them a try!